آموزش سه روش اضافه کردن CSS به html
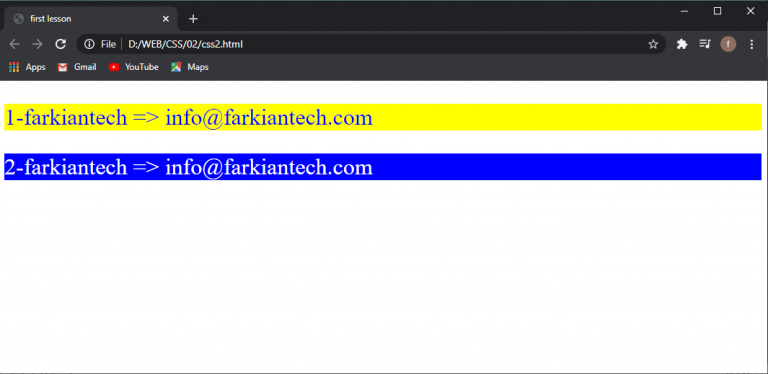
در جزوه قبل دیدیم که به روش css inline توانستیم style مورد نظر خود را به متن ها اضافه کنیم.
<!DOCTYPE html>
<html>
<head>
  <title>first lesson</title>
</head>
<body>
<p style="color: blue; font-size: 200%; background-color: yellow;">1-farkiantech => info@farkiantech.com</p>
<p style="color: white; font-size: 200%; background-color: blue;">2-farkiantech => info@farkiantech.com</p>
</body>
</html>
به هرکدام از این ویژگی هایی که در style خود استفاده میکنیم property میگوییم.
بعضی مواقع به دلیل پیچیدگی سایت و طولانی بودن کد های html نیاز است که CSS خود را جدا از HTML بنویسیم.
CSS internal
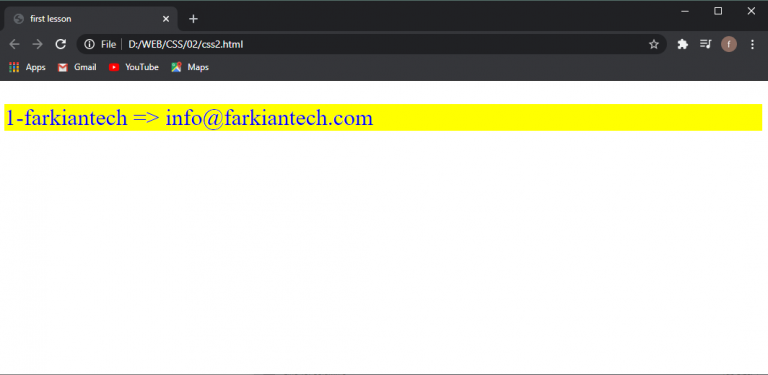
برای این نوع اضافه کردن css، کد آن را در المان style و در تگ head اعمال میکنیم.
<!DOCTYPE html>
<html>
<head>
  <title>first lesson</title>
  <style type="text/css">
    p{
      color: blue;
      font-size: 200%;
      background-color: yellow;
    }

  </style>
</head>
<body>
<p>1-farkiantech => info@farkiantech.com</p>

</body>
</html>
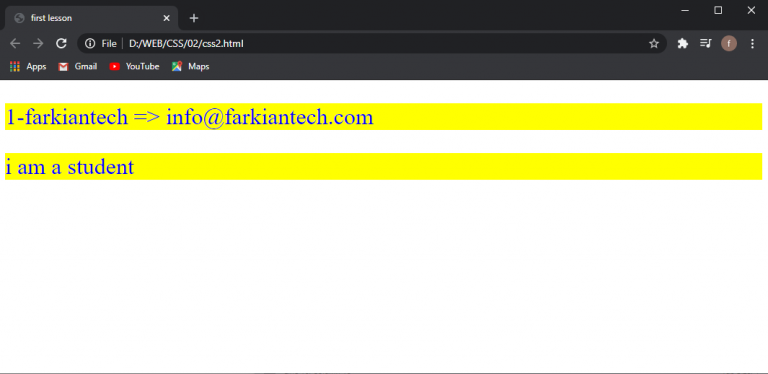
حال تصور کنید یک پاراگراف دیگر هم دارم.
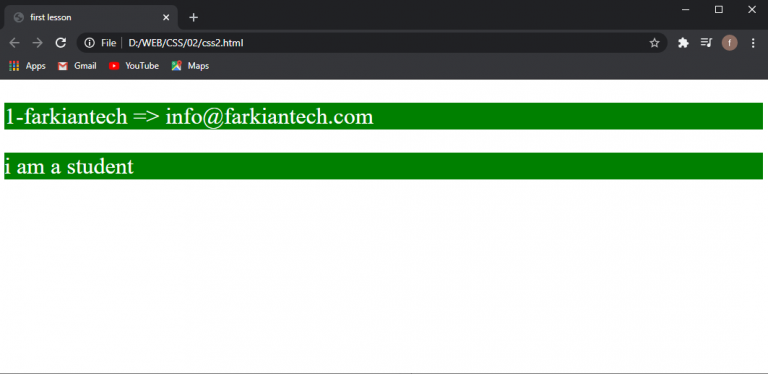
<!DOCTYPE html>
<html>
<head>
  <title>first lesson</title>
  <style type="text/css">
    p{
      color: blue;
      font-size: 200%;
      background-color: yellow;
    }

  </style>
</head>
<body>
<p>1-farkiantech => info@farkiantech.com</p>
<p>i am a student</p>

</body>
</html>
میبینید که به هر دو پاراگراف این ویژگی ها اعمال شده است. به این دلیل است که ما در استایل ویژگی ها را برای تگ p تعریف کردیم. پس هر تگ p که در صفحه دیده شود این ویژگی ها را میگیرد.
تا به اینجا css inline و css internal را یاد گرفتیم.
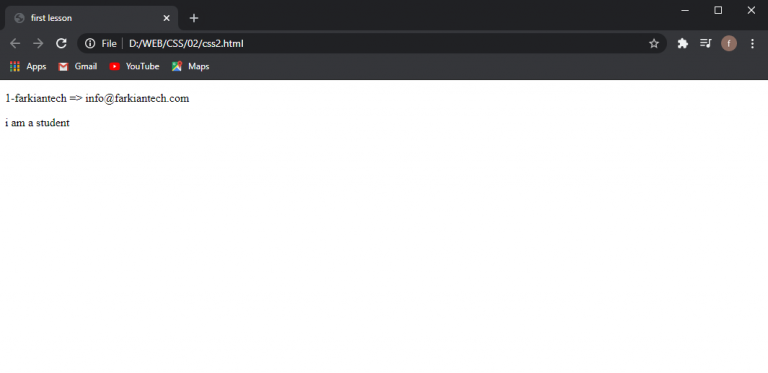
حال میخواهیم از css external استفاده کنیم. یعنی کل کد های مربوط به css را در یک فایل جدا با پسوند .css ذخیره کنیم.
به صورت زیر:
<!DOCTYPE html>
<html>
<head>
  <title>first lesson</title>
</head>
<body>
<p>1-farkiantech => info@farkiantech.com</p>
<p>i am a student</p>

</body>
</html>
p{
  color: blue;
  font-size: 200%;
  background-color: yellow;
}
میبینید که پس از ساخت فایل css و انتقال کد های css از فایل .html به فایل .css هیچ تغییری اعمال نشد.
به این دلیل است که شما هیچ دستوری را ننوشته اید که بتواند فایل .html را به فایل .css متصل کند. برای اتصال این دو بهم دیگر کافیست از تگ link استفاده کنید و آن را در تگ head بنویسید.
سپس href را اسم فایل .css خود قرار داده تا اتصال برقرار شود.
<!DOCTYPE html>
<html>
<head>
  <title>first lesson</title>
  <link rel="stylesheet" type="text/css" href="text.css">
</head>
<body>
<p>1-farkiantech => info@farkiantech.com</p>
<p>i am a student</p>

</body>
</html>

حال به راحتی میتوانیم با فقط یک بار اعمال تغییر، در هر دو تگ p تغییر ایجاد کنیم.
p{
  color: white;
  font-size: 200%;
  background-color: green;
}
برای دیدن آموزش های بیشتر جزوات CSS را دنبال کنید.